Pytorch的安装指南
Pytorch的安装指南
视频教程
PS:嫌麻烦anaconda在base环境就行,不需要再建立一个新环境,以防萌新环境混乱。
一堆官网
CUDA:https://developer.nvidia.com/zh-cn/cuda-toolkit
Cudnn:https://developer.nvidia.com/rdp/cudnn-archive
Pytorch:https://pytorch.org/
个人版本:
CUDA:
1 | https://developer.nvidia.com/cuda-11-7-1-download-archive |
Cudnn:
1 | https://developer.nvidia.com/compute/cudnn/secure/8.6.0/local_installers/11.8/cudnn-windows-x86_64-8.6.0.163_cuda11-archive.zip |
Pytorch:
1 | conda install pytorch torchvision torchaudio pytorch-cuda=11.7 -c pytorch -c nvidia |
前两个下载后一个在base环境安装
一点提示
在pycharm中terminal直接启用anaconda-base环境的方法
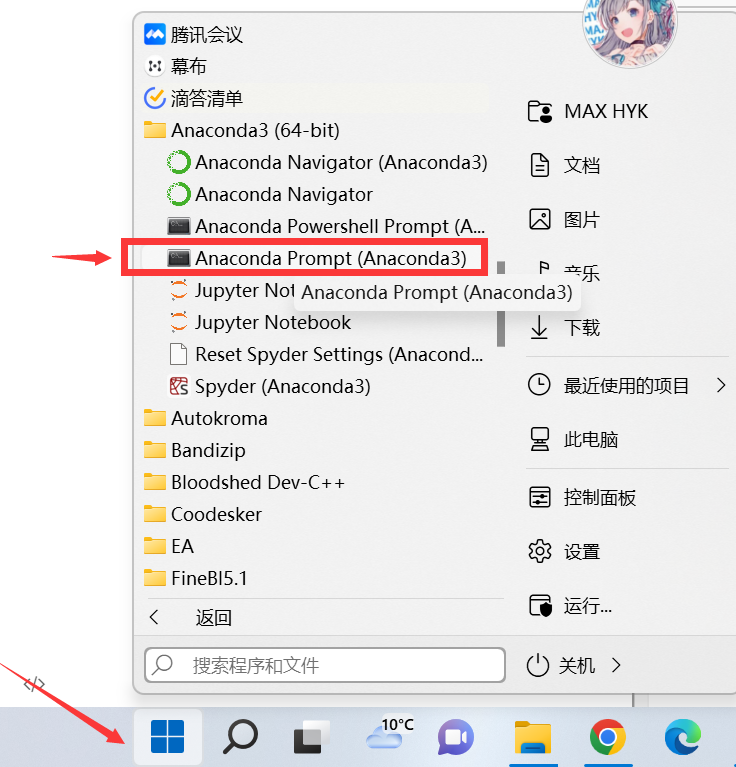
找到该文件右击属性
复制目标路径“cmd”开始所有内容
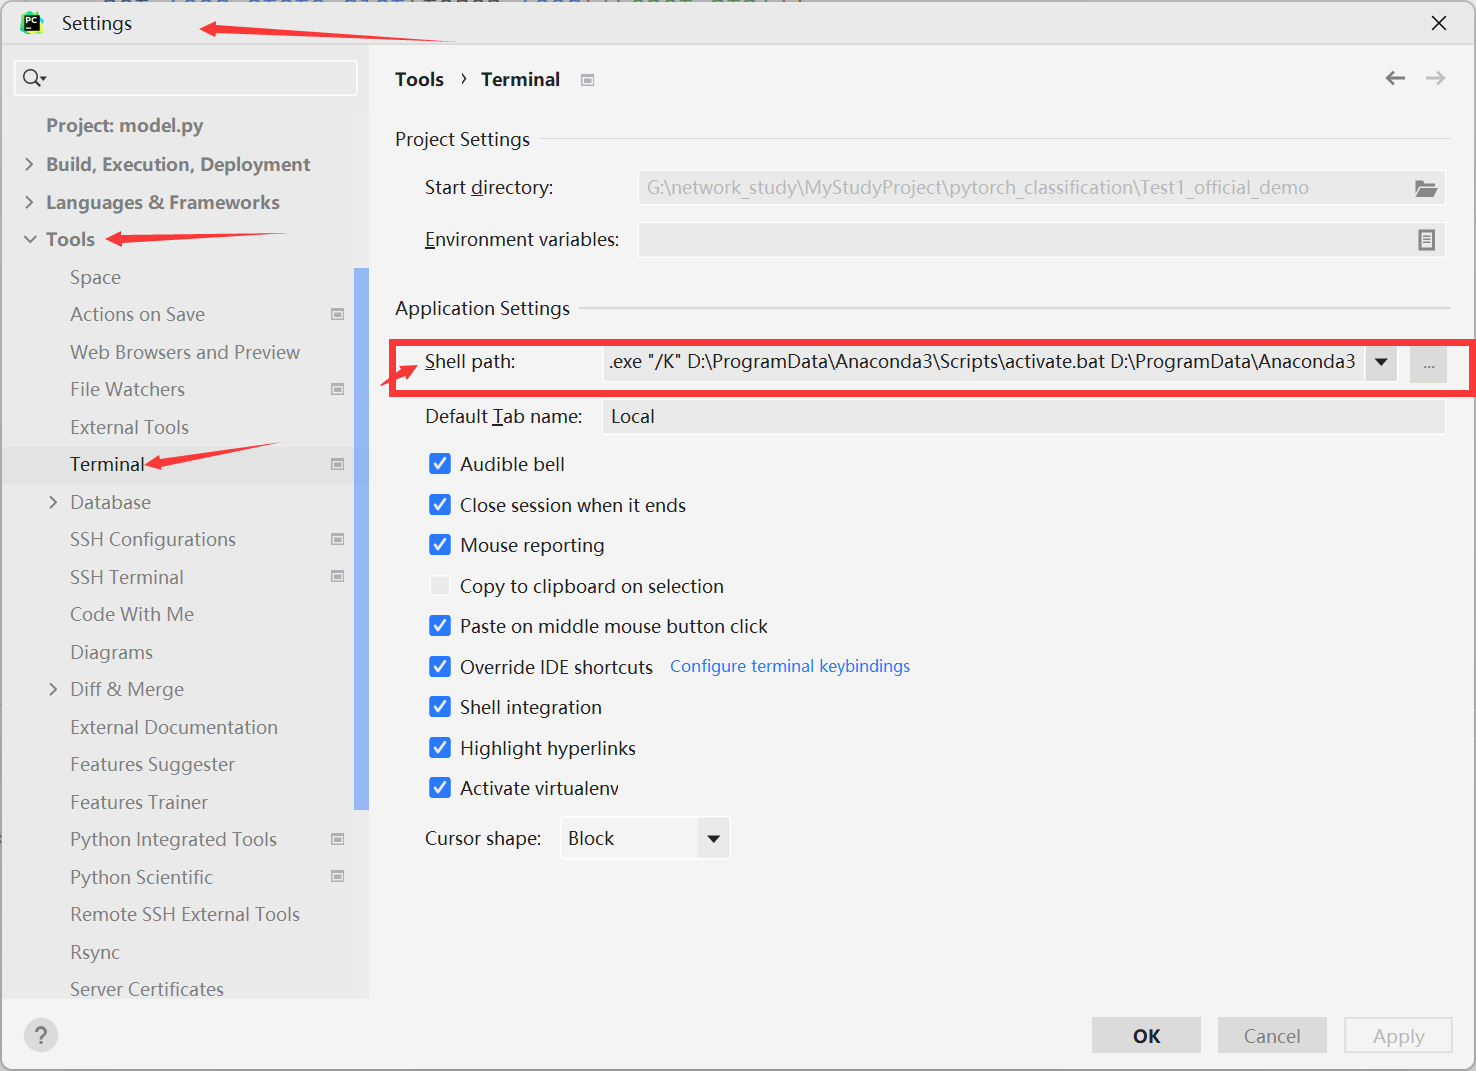
settings-tools-terminal-Shell path粘贴你复制的内容 点击OK 重启pycharm
Anaconda中conda更新
我们用
conda install xxx来安装包时,经常会遇到如下问题:1
2
3failed with initial frozen solve. Retrying with flexible solve.
Solving environment: failed with repodata from current_repodata.json, will retry with next repodata source.
12这其实是conda的环境不适配,我们需要将对环境进行更新,通过如下几个步骤:
1
2
3
4
5
6
7# 查看版本
conda -V
# 更新conda环境
conda update -n base conda
# 更新conda的所有包
conda update --all
123456做完这些之后,再用
conda install xxx就不会有上面的问题了。
本博客所有文章除特别声明外,均采用 CC BY-NC-SA 4.0 许可协议。转载请注明来自 Study-HYK!


